Pixel8系、Pixel7、Pixel7 Pro、Pixel7a、その他の Pixel でも同様の方法で行なえます。
スマートフォン版 Google ドキュメントで画像を挿入する方法を解説します。
jpg, png, gif のような一般的な画像形式であればドキュメントに挿入可能です。webp は対応していません。
画像を挿入するには?
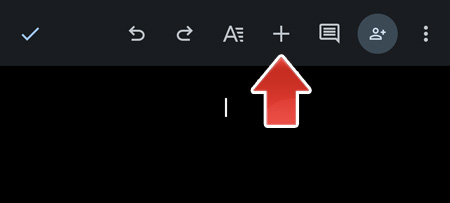
画面上部の「+」ボタンをタップします。
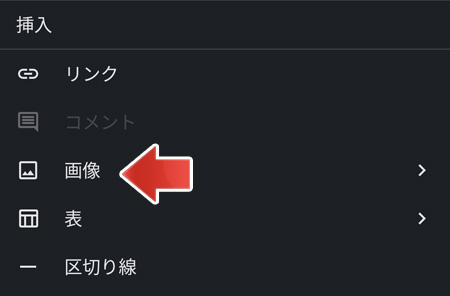
メニューの中から、画像をタップします。
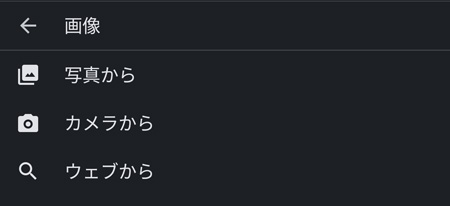
どこから写真を持ってくるか選択します。
| 写真から | スマートフォン内にある写真を使用 |
| カメラから | その場でカメラを使用して撮影 |
| ウェブから | ウェブからフリー写真素材などを挿入 |
ウェブから挿入する場合、著作権に注意してください。
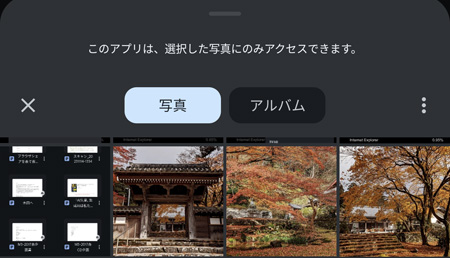
挿入したい写真をタップします。
ドキュメントに画像が挿入されました。
画像を移動するには?
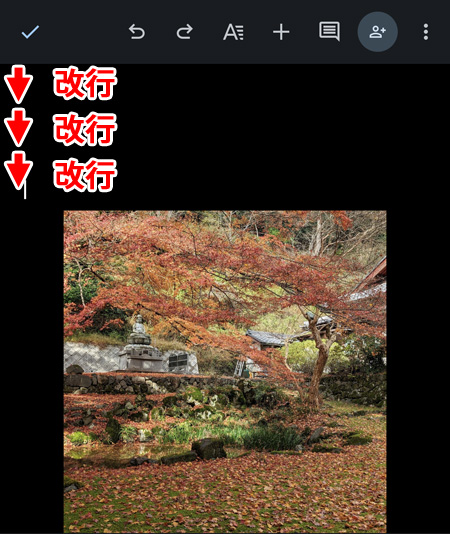
改行することで、画像の位置が下がっていきます。画像が1行に埋め込まれているからです。
自由に移動するには?
画像を自由に動かすには、テキストの折返し設定を変更します。
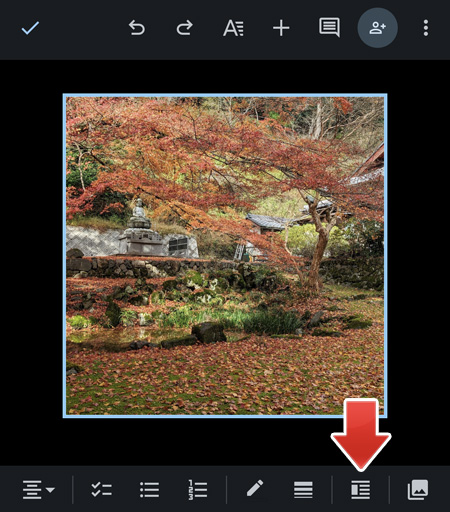
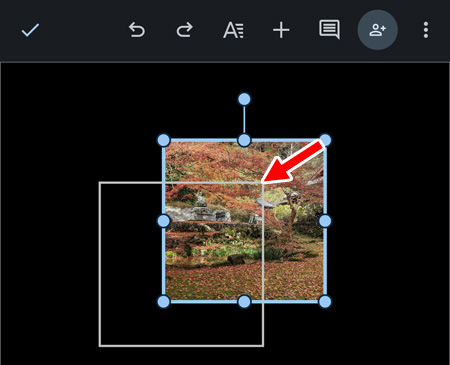
画像をタップして選択状態にして、右下のテキストの折返しボタンをタップします。
すると印刷レイアウト画面になります。
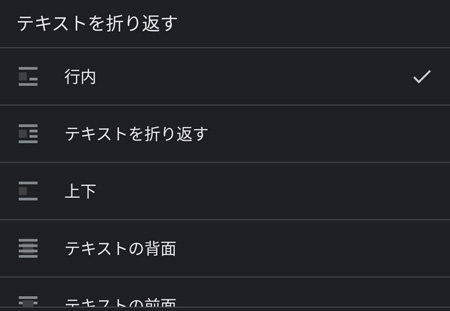
テキストの折返し設定のいずれかを選択します。
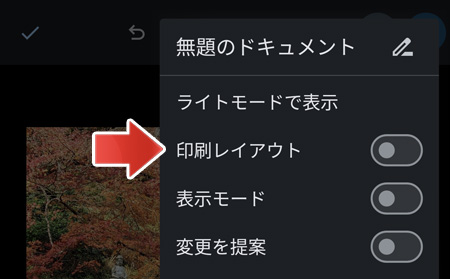
| 行内 | 画像が1行を独占します |
| テキストを折り返す | 画像の横にもテキストを配置できます |
| 上下 | テキストは画像の上下に配置されます |
| テキストの背面 | テキストは折り返さず画像の上に重ねてテキストを表示します |
| テキストの前面 | テキストは折り返さず画像の下にテキストを表示します |
テキストの折返し設定を「行内」以外にすると、画像を自由に動かせるようになります。
画像をタップしてからスライドすることで、画像を移動する事ができるようになります。
画像のサイズを変更するには?
画像のサイズを変更するには、印刷レイアウト画面へ移動します。
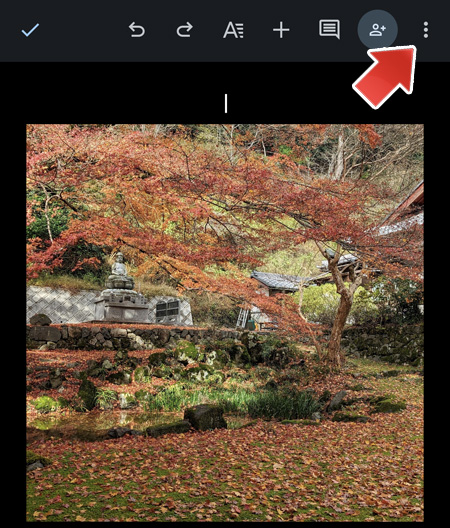
右上の「︙」ボタンをタップします。
印刷レイアウトのスイッチをオンにします。
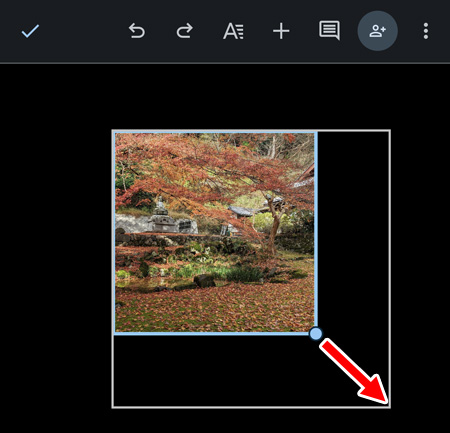
画像の四隅のツマミをスライドすることで、画像のサイズを変更できます。
画像を削除するには?

画像をタップして、メニューの中から「︙」ボタンをタップします。
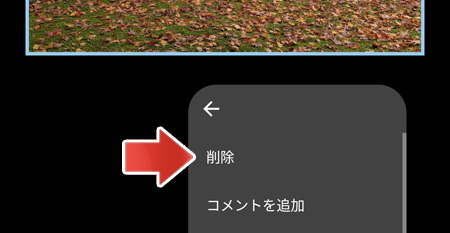
メニューの中から、削除をタップすると画像を削除します。
画像に枠線をつけるには?
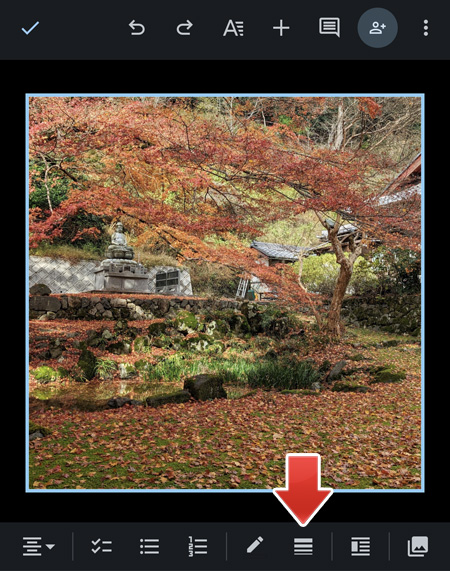
画像をタップして選択状態にして、画面下部の枠線ボタンをタップします。
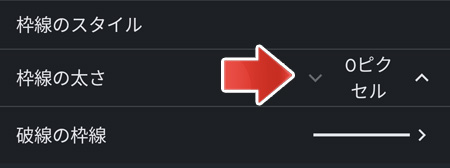
枠線の太さを設定します。「^」ボタンで太くします。
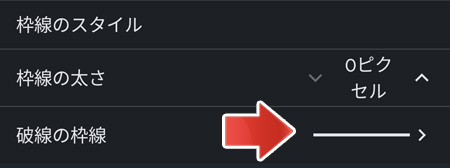
枠線は直線の他、破線も設定できます。
枠線の色
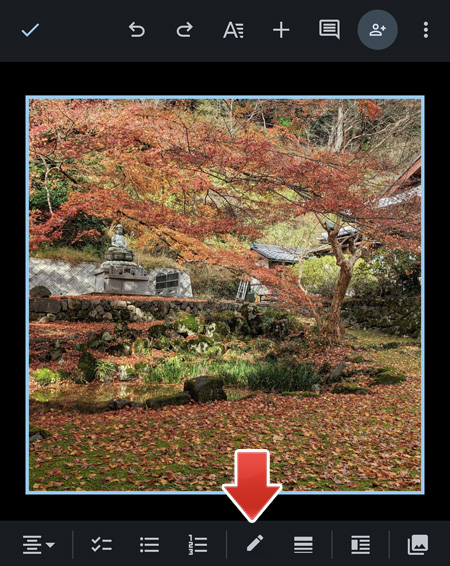
枠線の色を変更するには、鉛筆アイコンをタップします。
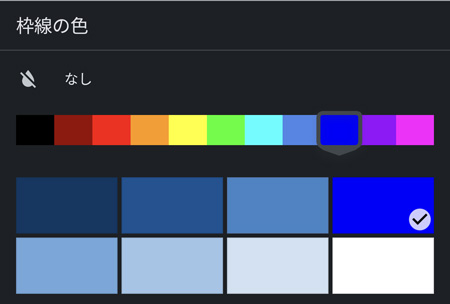
お好みの枠線の色をタップしてください。

画像に枠線が付きました。
画像のトリミングはできない
Google ドキュメントで画像のトリミングはできません。
しかし、予め小さい画像を挿入しておいて、画像の置換えをすると擬似的にトリミングのような事ができます。
画像をタップして、メニューの中から「︙」ボタンをタップします。
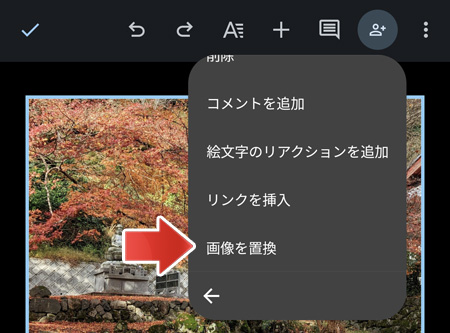
メニューの中から、画像の置換をタップして置き換える画像を選択します。
スマートフォンで撮影した縦長の写真も小さく収める事ができます。
厳格にトリミングしたい場合は Google フォトを使用してトリミングをしてください。
関連記事
Google フォトで写真をトリミングするには?